Implement a Hover Synthetic Interaction
Hover synthetic interactions reveals additional links or content, enhancing content visibility for indexing by bots. Let's go through the process of implementing a hover policy for your page.
Objective
This guide will walk you through the steps of creating and implementing your first hover synthetic interaction:
- Finding the
htmlSelector - Testing the
htmlSelector - Creating a hover policy
Prerequisites
- A Prerender Instance
- URL Paths
Step 1: Finding the htmlSelector
The htmlSelector is a unique string for identifying elements on a webpage based on their HTML structure. It is critical for performing synthetic interactions effectively and accurately, ensuring the correct targeting of elements during the automation of interactions in configuring Prerender behavior. Refer to these recommendations when choosing a selector. The htmlSelector is contained within the DOM or the shadow DOM of the web page.
To find the htmlSelector:
- Open Developer tools on your web browser
- For Chrome, Edge, and Firefox: Press
Ctrl+Shift+I(Windows/Linux) orCmd+Option+I(Mac). - For Safari: Enable Developer menu from the
Advancedtab from Safari's Preferences and pressCmd+Option+I.
- Use the
Elementstab (namedInspectorin Firefox) to view the HTML structure of the page. You can hover over different parts of the HTML code, and the corresponding parts of the web page will be highlighted. - Identify and copy the selector.
Step 2: Testing the htmlSelector
After identifying a potential htmlSelector, it's important to test its functionality to observe its behavior in rendering scenarios. To test the selector:
- Find and click on the
Consoletab from the Developer Tools. The console helps run Javascript code directly against the current viewing page. - Use the
document.querySelector()method to test your selector. This method returns the first element within the document that matches the specified selector, ornullif there are no matches. For example:
- Type
document.querySelector("yourSelector")into the console, replacing"yourSelector"with the CSS selector you want to test and PressEnterto run the command. For instance, enter#login-buttonto test a selector for an element with the IDlogin-button:
document.querySelector("#login-button")
If the selector is correct and the element exists, the console will display the HTML of that element. If the selector is incorrect or no element matches, it will return null.
- Inspect the output to ensure it returns the intended element. Double-check your selectors for typos, incorrect classes, or IDs if testing the selector returns a
nullvalue. - Modify and test your selector incase of any errors. This iterative process ensures the accuracy and efficiency of your selectors.
Step 3: Create a Hover Policy
Now we have a selector, we can go ahead to create a hover policy:
- Navigate to Synthetic Interactions on your instance.
- Click Add Policy and configure the following details:
- Select Hover as the Interaction Type
- Select Specific as the Interaction Scope. This setting means our interaction will apply to a specific page.
- Choose a Device Type, and enter a Waiting Time After Interaction Execution in ms.
- Enter the chosen and tested
htmlSelectorfrom previous steps. - (Specific policies only) In URL Paths, enter one or more URL paths to which the policy will either apply or be excluded from, depending on which operator you select.
- (Specific policies only) In the Operator field, select on of the following:
- Equal - Applies the policy to all specified URL paths.
- Not equal - Applies the policy to all origin URLs except the specified URL paths.
- Select the Operator applied on the URL paths
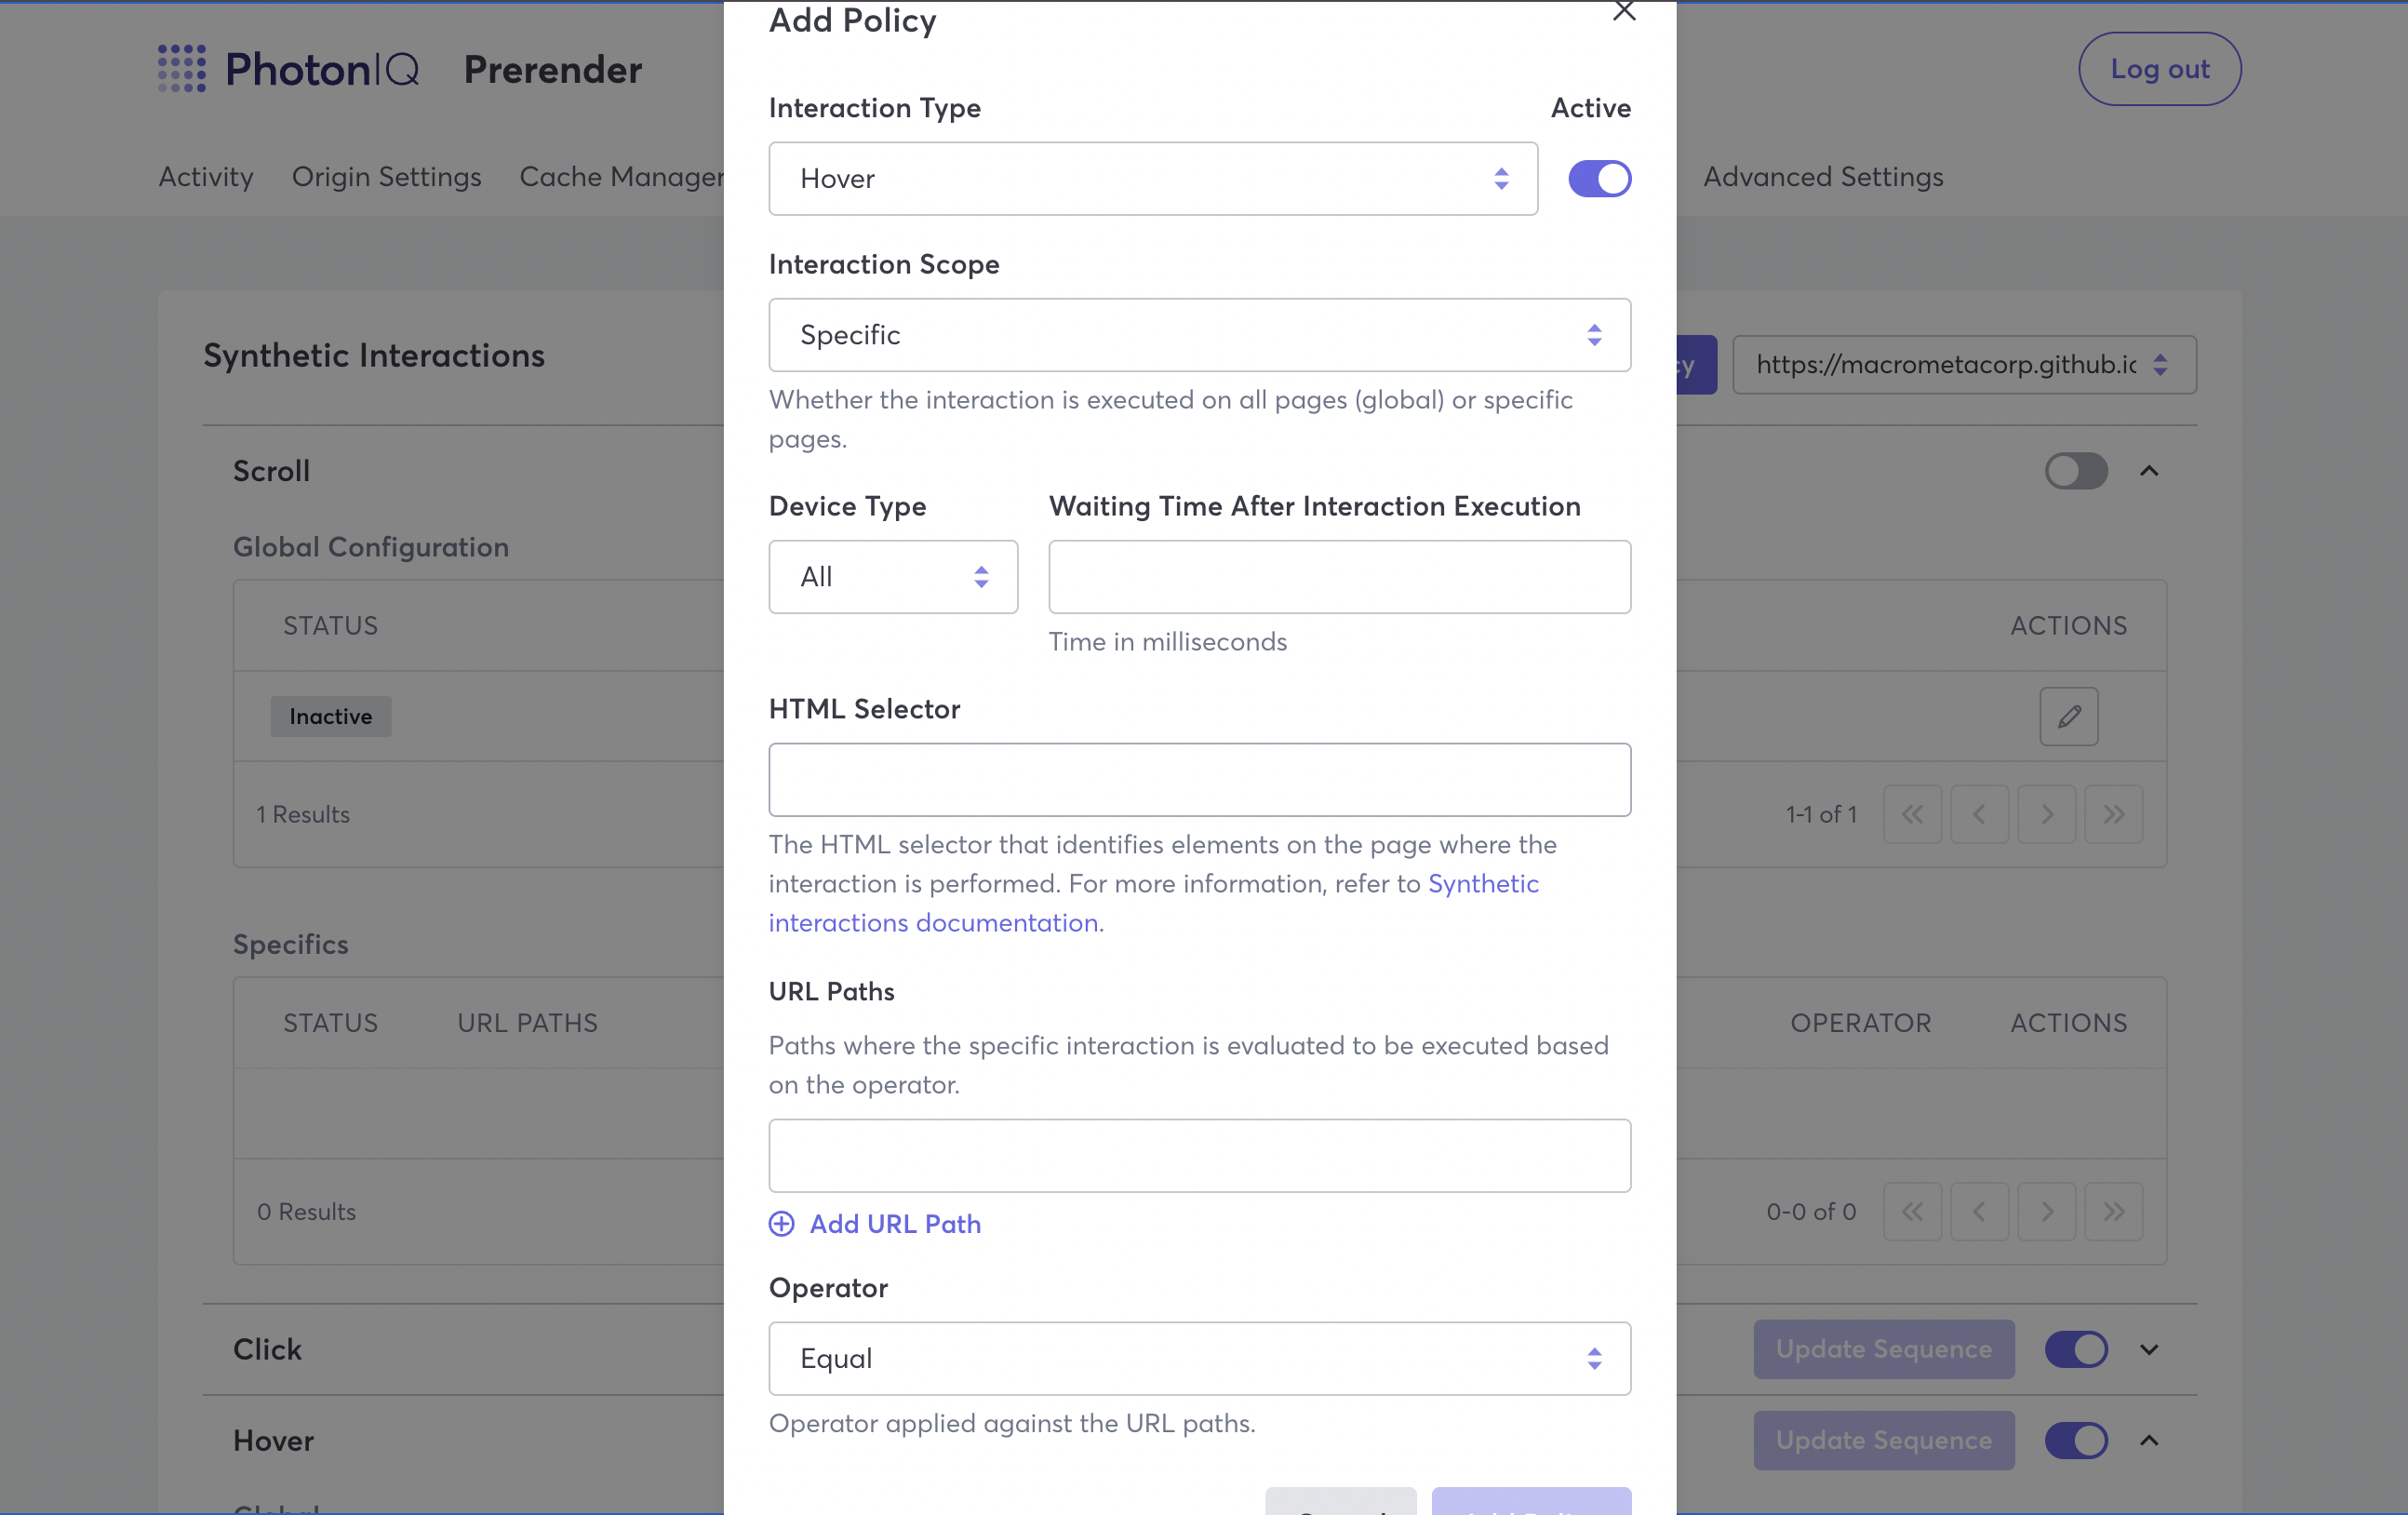
- Click Add Policy