Quickstart
Collections are the fundamental unit of Macrometa GDN, allowing you to create a globally distributed database for your business needs. This tutorial is Macrometa's version of "Hello, world!", simplistic by design, and demonstrates how you can quickly use our stateful serverless back-end to run a globally distributed database with local read-write latencies around 50ms.
If you've already completed this tutorial, then you can add search to your application.
Objectives
This tutorial walks you through the following tasks:
- Creating a global address book via document collection
- Inserting and querying user data from the new collection
- Creating a fully operational API via Query Workers
Prerequisites
- A Macrometa account with sufficient permissions to create collections.
Follow these steps
Step 1: Create a document collection
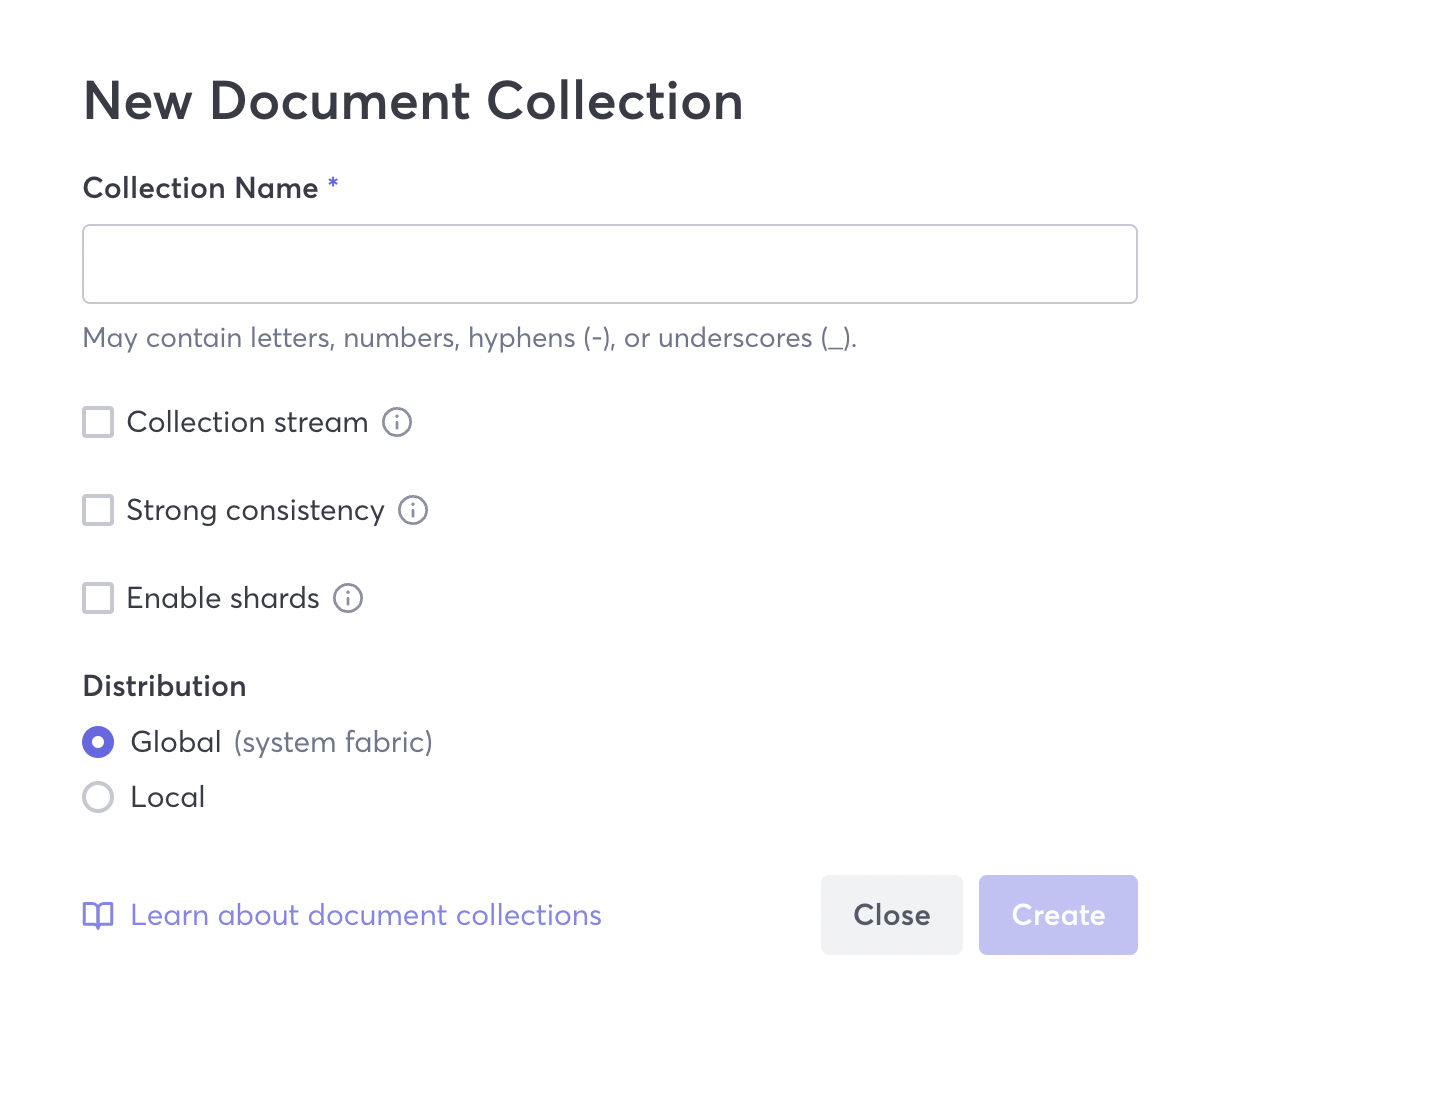
A collection is a group of documents with a unique name and identifier. For this tutorial, we will create an address book document collection that contains names and addresses.
- Log into your Macrometa account
- On the side menu, click Data > Collections.
- Click New Collection.
- Click Document
- Enter
addressesas the Collection Name. You can also do the following after entering a collection name:- Enable the collection to act as streams
- Ensure the collection has strong consistency
- Enable sharding
- Indicate the distribution level for your collection (global or local). This tutorial will create a global collection.

Macrometa distributes this collection to every location in the global fabrics. If you're curious about the locations, click Dashboard to see the default fabric locations.
Our collection is now accessible worldwide! However, it's empty. Let's fix that.
Step 2: Add data to your new collection with a query
There are several ways to add data to a collection, including importing CSV or JSON files. For this quickstart, we'll use a query to insert records.
Click Compute > Query Workers from the side menu of your dashboard.
Copy and paste the code block below into the query editor. This code block contains six names and email addresses.
// Query to insert addresses
FOR persons IN [
  { firstName: "Captain", lastName: "Nemo", email: "cpnemo@gnautilus.com" },
  { firstName: "Pierre", lastName: "Aronnax", email: "pierre@asoc.org" },
  { firstName: "Ned", lastName: "Land", email: "ned@nature.org" },
  { firstName: "Cyrus", lastName: "Smith", email: "cycy@laborrights.org" },
  { firstName: "Tom", lastName: "Ayrton", email: "tommy@water.org" },
  { firstName: "Jules", lastName: "Verne", email: "j.garcia@en-julesverne.nantesmetropole.fr" }
  ]
  INSERT persons INTO addresses
Click Run Query. This inserts the records into the
addressescollection you made earlier and returns a query result. It returns empty brackets as we're inserting data, not reading anything back.(Optional) Click Query Info in the Query Result to get info on every step in the query, which is useful for tracking performance.
Click Run Query two more times. Every click adds the six records again so the collection has more records. Keep clicking to add more records or change values in the code block for different records.
Step 3: View the documents in the collection
Return to the collection and view the new records added by the query.
- Click Data > Collections.
- Click addresses.
Macrometa displays a list of keys and values for every record in the collection. Now you can:
- Click a record to view it. While viewing, you can edit it by typing changes and click Save.
- Click the red circle next to a record to delete it.
- Click the funnel at the top to filter records. Try entering the following (case-sensitive):
- Attribute name: firstname
- Attribute value: Captain
When you are done experimenting with records, continue to the next step.
Step 4: Query the documents in the collection
Now, let's query the data you just added to your collection.
Click Compute > Query Workers.
Click New Query to clear the code editor.
Copy the code block below and paste it into the code editor.
FOR docs IN addresses RETURN docsClick Run Query.
Macrometa returns all records in the collection. You can view it as a Table or JSON. You can also click Query Info to see detailed performance metrics.
Step 5: Save the query as an API endpoint
Macrometa allows you to save a query as a Query Worker.
- Click Save Query.
- Name the query getAddresses and click Save. This saves the query so you can use it again.
- Click Run Query.
- Click API Endpoint.
Macrometa displays a curl command you can use to access this endpoint from anywhere in the world in under 50ms.

Step 6: Finish the API
In the previous step, you created the getAddresses Query Worker, which is basically the READ operation in a CRUD API (Create, Read, Update, Delete). Build the rest of the API by creating a Query Worker for each of the following queries.
- In Query Workers, click New Query.
- Copy and paste a code block.
- Save the query using the name with each code block.
- Click API Endpoint and record the API Usage information.
- Test the query.
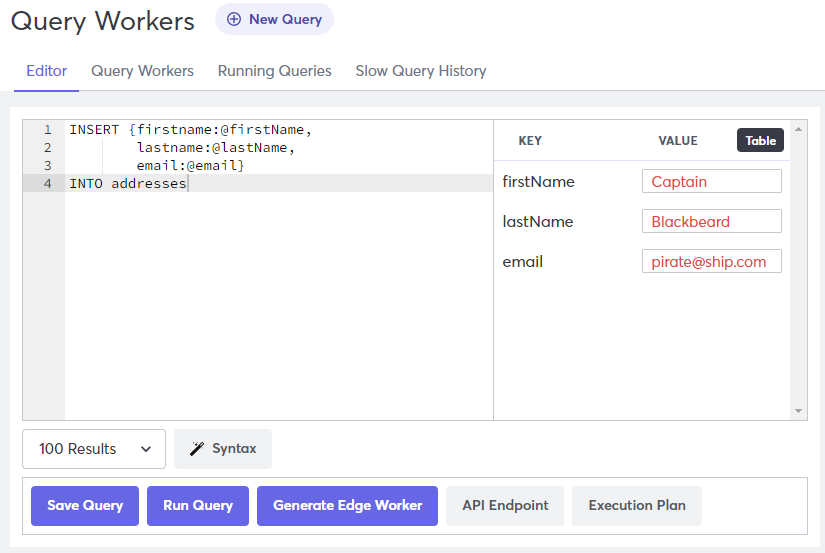
To test a query, enter any necessary information in the bind parameters and click Run Query or use the curl API call. The screenshot below shows how to enter information for testing.

If a query requires a key, you must enter one in the bind parameters or else the query will fail with an error.
Working with Query Workers
Here are more examples of manipulating your collections with the Macrometa query editor.
Create a new record
Name: saveContact
INSERT {firstname:@firstName,
        lastname:@lastName,
        email:@email}
INTO addresses
Update a record
Name: updateContact
UPDATE @_key WITH { firstname:@firstName,
                    lastname:@lastName,
                    email:@email}
IN addresses
Delete a record
Name: removeContact
REMOVE @_key
IN addresses
Name used in these queries refer to the query name
You have a fully-functional API for your application. We made a front-end for you to take your new back-end for a spin.