Get Started with Prerender
Although PhotonIQ offers Prerender as a completely managed, white-glove service, this guide provides a practical approach to setting up and using the service for self-starters.
Objectives
This guide will help you:
- Set up your origin
- Validate and monitor Prerender
- Purge the Cache
- Customize rendering behavior with Prerender headers
Preparing your site for Prerender
Before using the service, we recommend doing the following:
Optimize your site SEO: Prerender works best with well-structured content to improve the findability and visibility of your site, and effective SEO helps you to achieve this. Here are some website components you should review:
- Metadata: Properly configure your site’s metadata (titles, descriptions, etc.) to improve indexing for bots.
- Content Structure: Use H1-H6 headings and structured content for better SEO crawling.
- URL Structure: Keep URLs clean, concise, and relevant. Avoid lengthy query strings when possible.
- Relevant Content: Ensure your content remains relevant and helpful to your target audience.
Determine your caching strategy: Prerender's Cache Manager allows you to cache certain pages from your origin. Depending on your business data and how often this data is accessed, decide what pages need caching to reduce render time and costs.
Prerequisites
Authentication: Before using Prerender and its features, you need to authenticate and authorize your account. Prerender uses its Auth service to manage access to the service. This Auth service allows you to create and manage your Prerender Instance and interact with the Prerender API, and offers three classes of users:
- The Administrator
- The Billing Manager
- Monitoring and compliance officer
A Prerender instance. This Instance gives you access to the service and other tools needed to use it. Contact Macrometa engineers to help set up your Prerender Instance.
Target domain (yourwebsite.com)
Set Up Origin
Before leveraging the different capabilities of Prerender, you need to define your origin, which is the target site for Prerender.
This step is crucial as it enables Prerender to understand the source of the pages and affects the caching strategy for ensuring optimal performance. For example, a regularly-updated products page may require shorter periods between subsequent caches than a contact page.
To set up your origin:
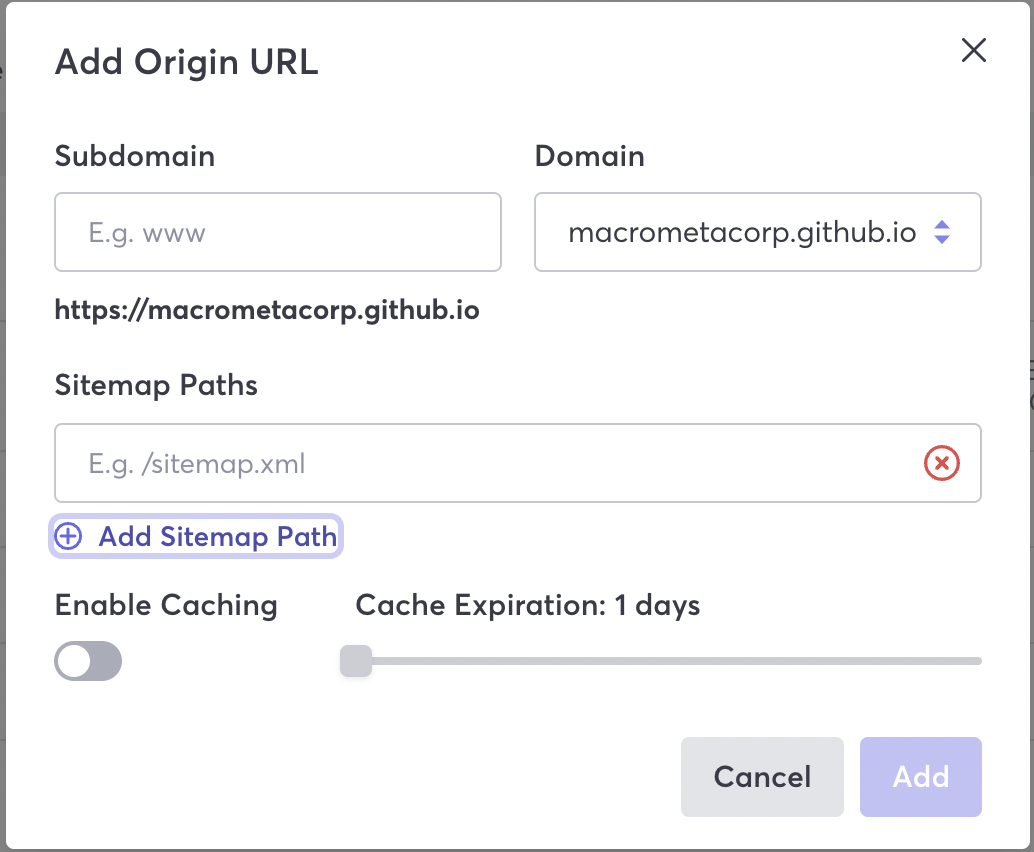
Navigate to Origin Settings on your Prerender dashboard
Click Add Origin URL
Configure your origin by filling the values for the following fields.
- Subdomain - (Optional) Enter the target subdomain of the domain for Prerender.
- Domain - Select the target domain for Prerender.
- Sitemap Paths - (Optional) Click Add Sitemap Path and add the path to the sitemap. A sitemap path is a file that provides useful information about the pages and files in your site. It acts as a navigator for bots, helping them crawl your site more effectively.
infoAdding a sitemap path is needed if you intend to use a prefetching strategy, i.e, using Prerender to prefetch the URLs in your site.
- Enable Caching - Click to turn on caching, and select the cache expiration time (also called time to live (ttl)) in days.
You can further increase the capabilities of Prerender by configuring the following settings:
- (Optional) If using the web console, you can add a 404 identifier by adding an identifier string. A 404 identifier helps Prerender accurately report 404s.
- (Optional) Review and update Prerender settings for your origin. This configuration updates may include customizing the URL block list and adding various types of headers.
- (Optional) If you are using a prefetching strategy, then configure prefetching.
- (Optional) Set up synthetic interactions.
- Find the HTML selector that you want to act on.
- Create a synthetic interaction policy:
Validate and Monitor Prerender
After setting up your origin for Prerender, you can validate its operations and performance by observing monitoring metrics.
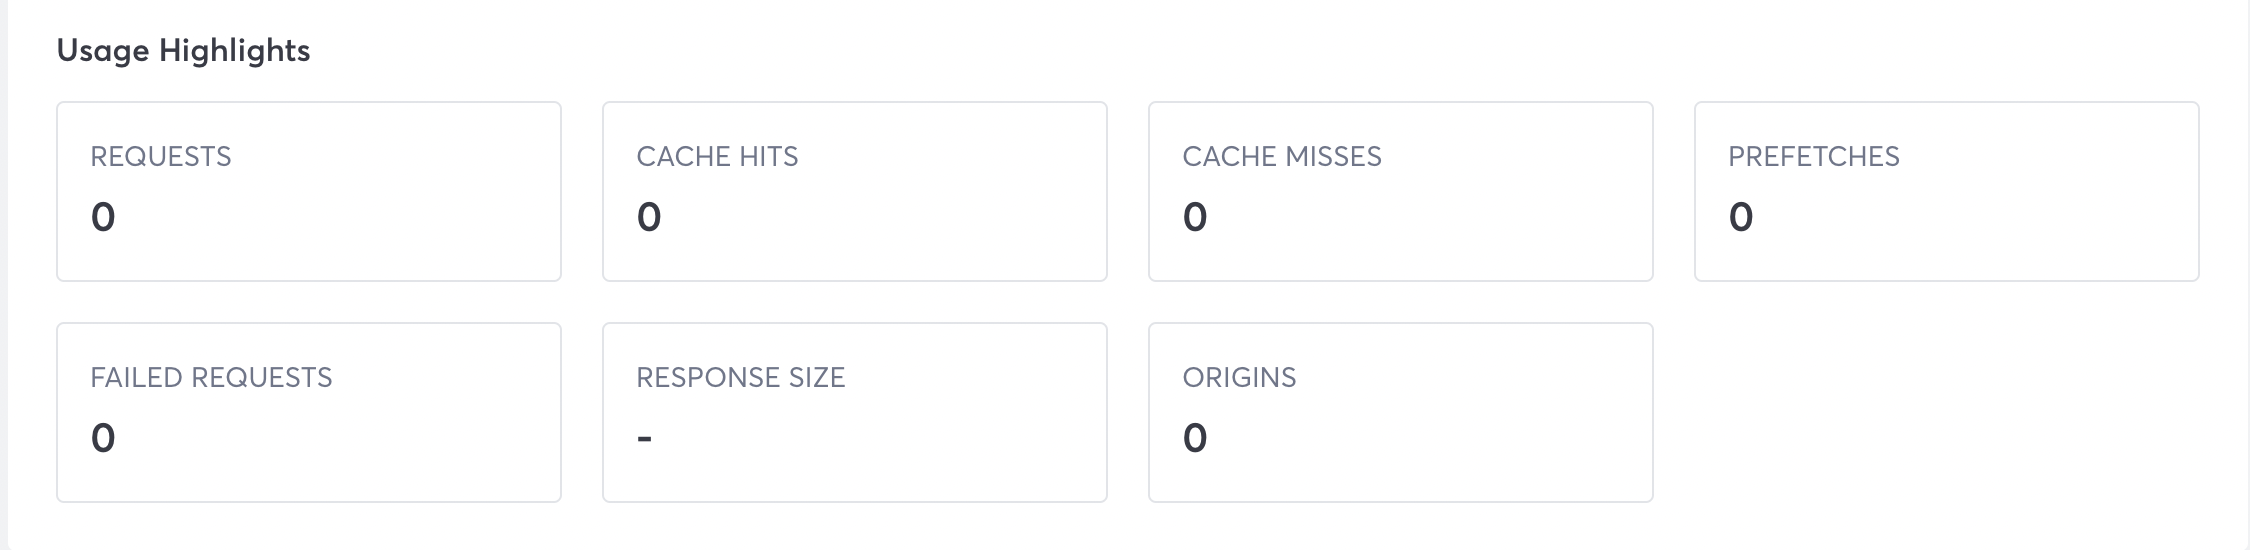
Navigate to Activity on your Prerender dashboard to view metrics like:
- Renders
- Request per second
- Usage highlights which provides information on other metrics like cache hits and misses, requests, prefetches, and failed requests.
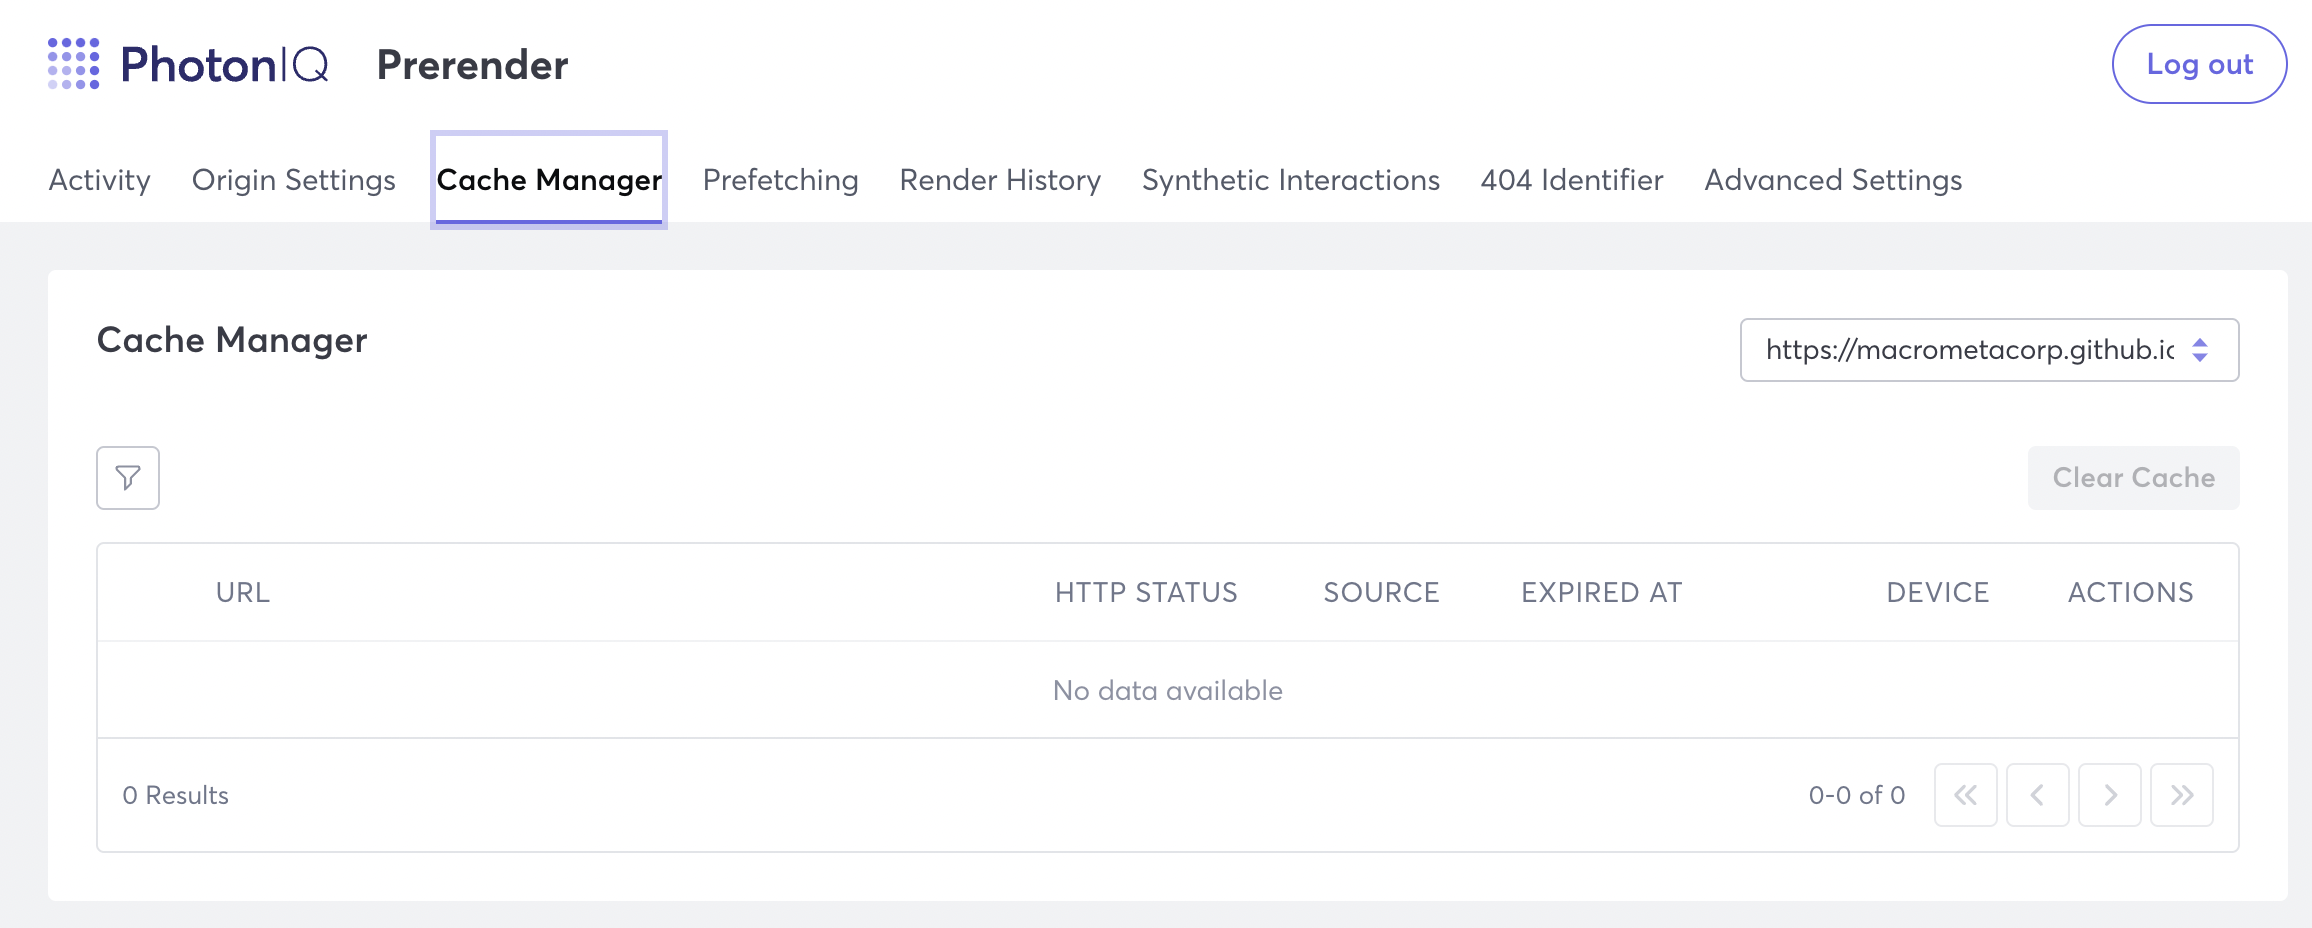
Purge the Cache
Prerender has a cache manager, which allows you to view information about the existing caches on your configured domains.
- To manage your cache, navigate to the Cache Manager. If you need to refresh your cached content, you can clear the cache.
This allows for targeted cache removal, specifying only the URLs you wish to clear. When accessing a URL with a cleared cache using the render endpoint, Prerender automatically renders the page and caches it for optimal delivery.
Customize with Prerender Headers
Prerender headers help guide how Prerender renders your pages to bots. For example, you can configure Prerender to render a page in a specified language using the pass-through header.
To customize with a pass-through header:
- Navigate to Advanced Settings on your Prerender Instance.
- Scroll to Pass-through Headers and click Add Pass-through Headers
- Enter the
Accept-languageheader and click Save.
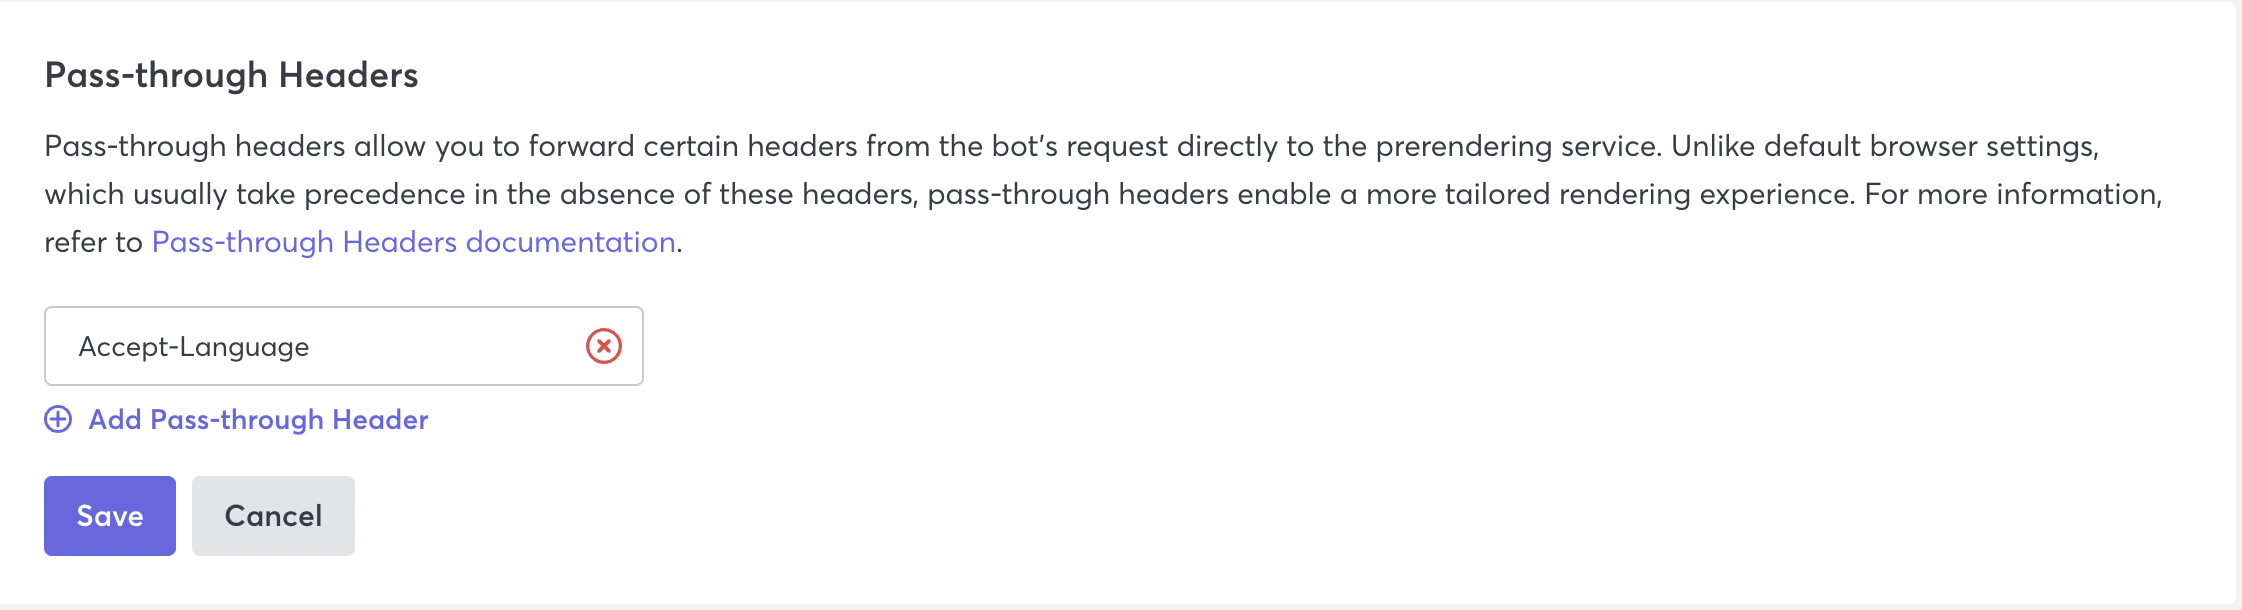
This header transmits any language preferences for bots to Prerender. For example, if the bots request contains preference for english, it passes this preference into the header, so Prerender renders the web content in English.